
Short Description
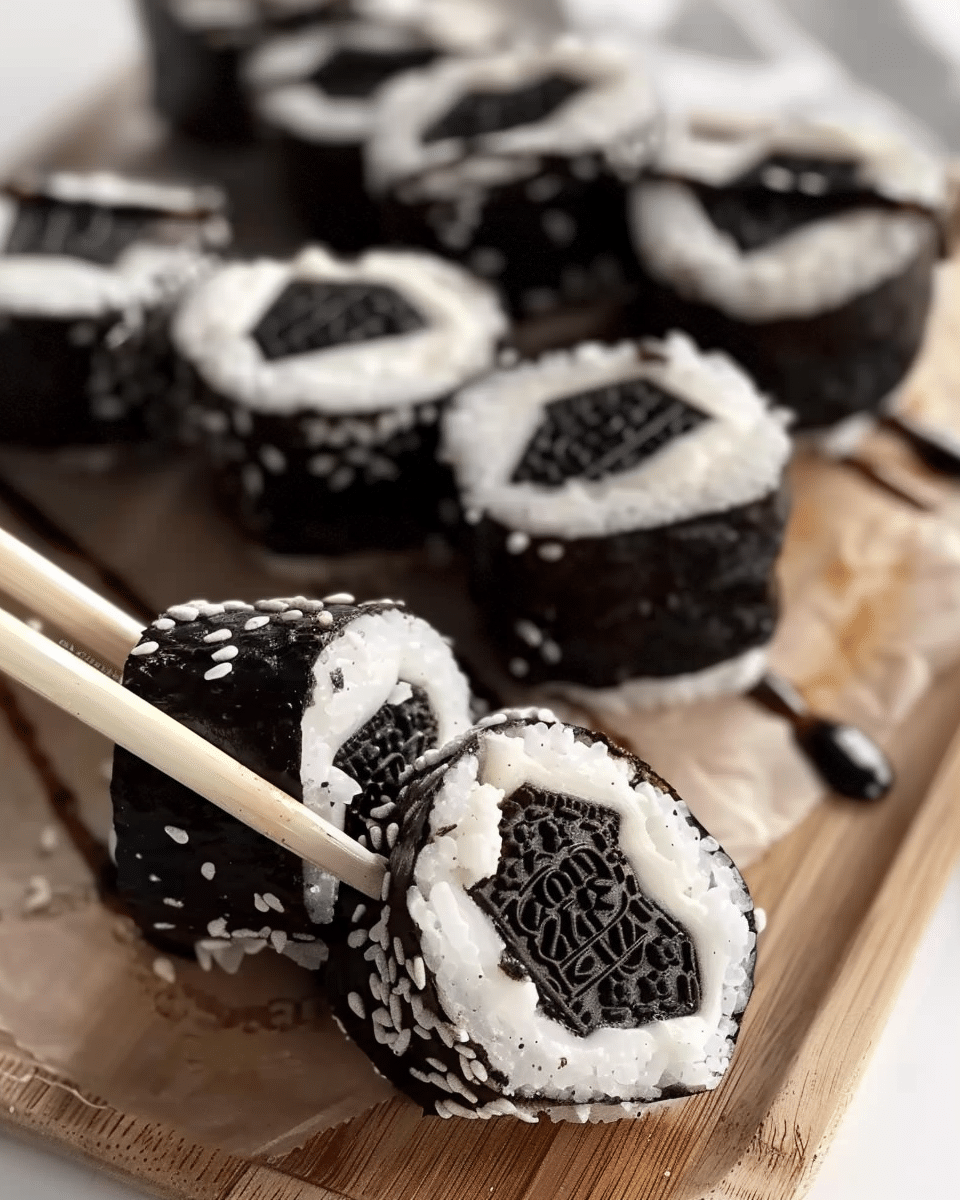
Delectable cookie “sushi” made by pressing Oreo crumb dough into a sheet, layering it with Oreo cream mixed with milk, then rolling and slicing into bite‑sized swirls—like sweet sushi rolls made from Oreos.
Why You’ll Love This Recipe
- Fun, whimsical dessert that looks like sushi but tastes like Oreos
- Easy to make with just Oreos and milk—no baking required
- Silky, creamy interior with rich cookie exterior
- Customizable: top with sprinkles, drizzle, or cut into mini or full-size rolls

Ingredients
(Tip: You’ll find the full list of ingredients and measurements in the recipe card below.)
- 24 Oreo cookies (separate the cream filling from the cookies)
- ¼ cup milk, divided use (about 3 tablespoons + 2 teaspoons)
Directions
Step 1: Make Oreo dough
- Place the Oreo cookies (without cream) into a food processor. Blitz until the cookies turn into fine crumbs.
- Add about 3 tablespoons of milk to the crumbs. Process again until the mixture forms a cohesive ball of dough.
Step 2: Flatten into a square sheet
- Lay a large piece of plastic wrap on your work surface. Transfer the Oreo dough ball onto it.
- Press down to flatten the dough, then use a rolling pin to roll it into an even ¼‑inch thick square.
- Trim off the edges so the sheet is a clean, uniform square.
Step 3: Prepare Oreo cream filling
- In a small bowl, combine the reserved Oreo cream with 2 teaspoons of milk. Mix until the filling is smooth and spreadable.
Step 4: Apply the filling and roll
- Evenly spread the milk‑softened Oreo cream over the rolled-out dough sheet.
- Using the plastic wrap as a guide, gently but firmly roll the dough into a tight log.
Step 5: Chill (optional)
You may wrap the rolled log in plastic wrap and refrigerate it for 15–30 minutes to firm it up, which makes slicing neater.
Step 6: Slice and serve
Unwrap the roll, slice into pinwheel-style pieces about ½‑inch thick (or to your preference), and enjoy immediately.
Servings And Timing
- Servings: About 20–24 pinwheel slices, depending on slice thickness
- Prep Time: ~10 minutes (blitzing, rolling, and spreading)
- Chill Time (optional): 15–30 minutes
- Total Time: ~10–15 minutes (not counting chill time)
Variations
- Full-size rolls: omit slicing to serve a single log like a chocolate roulade
- Toppings: drizzle with melted chocolate, dust with cocoa powder, or sprinkle chopped nuts or sprinkles on top
- Flavor additions: stir in a few drops of vanilla extract or flavored liqueur into the Oreo cream before spreading
- Mini version: use mini Oreos and cut smaller logs for fewer servings
- Fruity twist: top each slice with a slice of strawberry or raspberry after slicing
Storage/Reheating
- Storing: Place slices or entire roll in an airtight container. Store in the refrigerator for up to 2 days.
- Reheating: Not necessary—serve chilled or at room temperature.
FAQs
Can I Use Regular Oreos With Cream Filling?
No—separate the cream from the cookies. The cookie crumbs and added milk form the dough, and the cream is used separately to create the filling.
Is Milk Required?
Yes—the milk helps bind the Oreo crumbs into a dough and also softens the cream for spreading. Use dairy or plant-based milk if liked.
How Thin Should The Dough Sheet Be?
Roll the dough to about ¼‑inch thickness for best balance of crust and filling.
What If The Dough Is Too Crumbly?
Add a tiny bit more milk (½ teaspoon at a time) to help it bind better.
How Thick Should I Slice The Roll?
Aim for slices about ½‑inch thick to get approximately 20–24 rolls from one batch.
Can I Make This Ahead Of Time?
Yes—after rolling, wrap and refrigerate for up to 2 hours before slicing and serving.
How Can I Make It More Decorative?
Drizzle the finished slices with melted chocolate, dust with powdered sugar, or top with colorful sprinkles.
Is This Suitable For Kids?
Yes—this no-bake dessert is soft, sweet, and visually playful.
Can I Use Flavored Oreos?
Yes—any Oreo variation works. Chocolate, vanilla, or fruit-flavored cookies will all produce tasty rolls.
How Long Does The Roll Keep Its Shape?
It stays firm for a couple hours chilled. For longer display or serving, keep refrigerated to maintain structure.
Conclusion
Oreo Sushi is a creative, no-bake dessert that turns simple Oreo cookies into fun, sushi-like rolls. With minimal ingredients and prep, you can assemble cute pinwheels that are rich, creamy, and customizable. Chill for clean slicing, garnish as desired, and serve as a playful treat!
Print
Oreo Sushi
- Total Time: 15 minutes
- Yield: 20–24 slices
- Diet: Vegetarian
Description
No-bake Oreo Sushi is a playful dessert where crushed cookies become dough, rolled with creamy filling into sweet, sushi-like pinwheels—fun, quick, and irresistibly good.
Ingredients
24 Oreo cookies (cream and cookies separated)
¼ cup milk, divided (about 3 tablespoons + 2 teaspoons)
Instructions
- Place separated Oreo cookies (without cream) in a food processor. Blend into fine crumbs.
- Add 3 tablespoons of milk and blend until a dough forms.
- Place dough on plastic wrap and roll into a ¼-inch thick square. Trim edges for neatness.
- Mix Oreo cream with 2 teaspoons milk until smooth. Spread over the dough sheet.
- Using the plastic wrap, roll the dough into a tight log.
- Optional: Chill wrapped log in the fridge for 15–30 minutes for firmer slicing.
- Unwrap and slice into ½-inch pinwheels. Serve immediately.
Notes
- Add more milk gradually if dough is crumbly.
- Decorate with melted chocolate, sprinkles, or cocoa powder for flair.
- Use plant-based milk for a dairy-free version.
- Chill before slicing for cleaner swirls.
- Prep Time: 10 minutes
- Cook Time: 0 minutes
- Category: Dessert
- Method: No-Bake
- Cuisine: American
Nutrition
- Serving Size: 1 slice
- Calories: 65
- Sugar: 5 g
- Sodium: 60 mg
- Fat: 3 g
- Saturated Fat: 1 g
- Unsaturated Fat: 2 g
- Trans Fat: 0 g
- Carbohydrates: 9 g
- Fiber: 0 g
- Protein: 0.5 g
- Cholesterol: 0 mg


