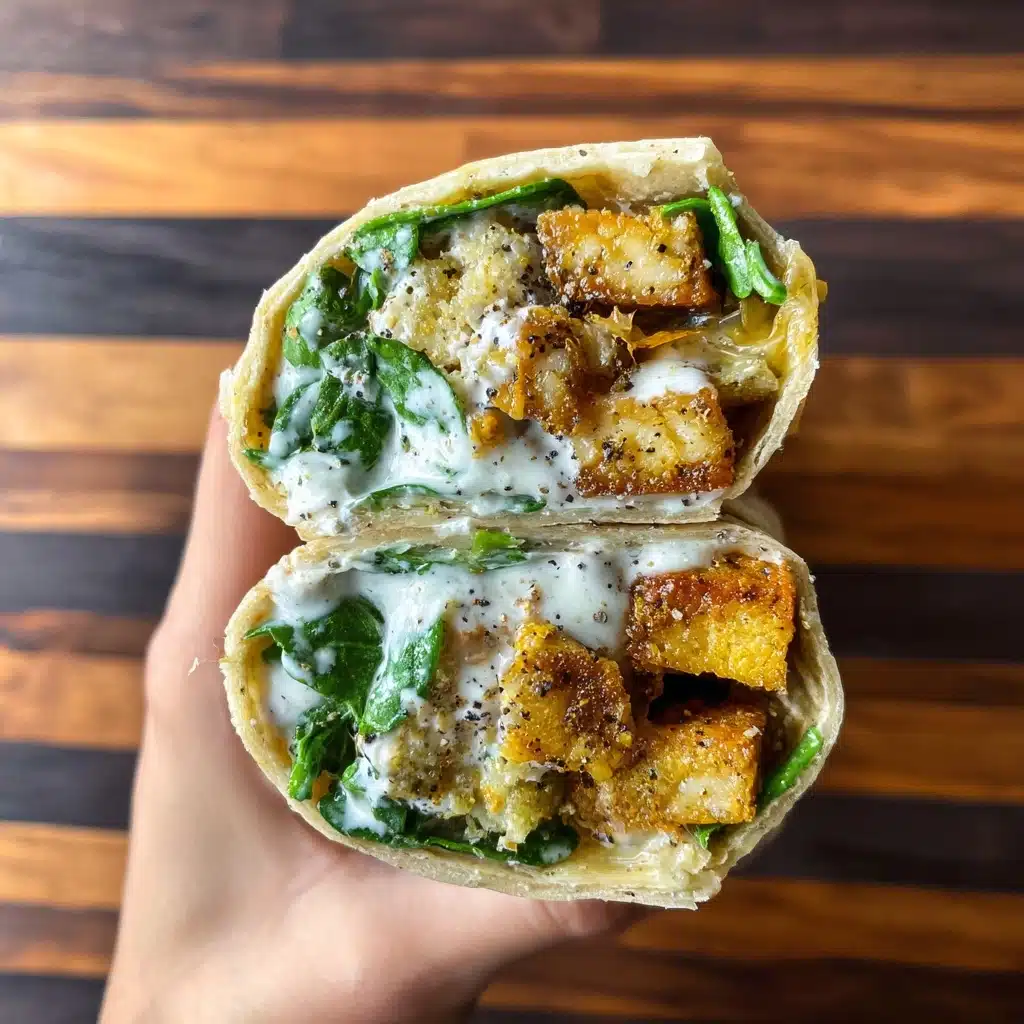
If you’re craving something that’s bursting with flavor, texture, and that unbeatable crunch, then you’ve landed in the perfect spot. These Easy Crispy Chicken Caesar Wraps (Extra Crunchy!) combine tender, smoky chicken with a creamy Caesar dressing and a fresh, crunchy salad all wrapped up in a golden-toasted tortilla. It’s a lunch or dinner game-changer that feels indulgent without any complicated steps. Once you try this wrap, it might just become your new go-to for busy weeknights or casual weekend gatherings!
Ingredients You’ll Need
Don’t let the list fool you—each ingredient is straightforward but essential, bringing harmony to the dish in taste, texture, and color. From the spices that coat the chicken to the crisp lettuce and sharp Parmesan, every element plays a vital role in making these wraps irresistibly delicious.
- 2 lb boneless chicken breast cut into cubes: The star protein, perfect for quick cooking and soaking up all those smoky spices.
- Salt to taste: Enhances the natural flavors and ties everything together.
- 1 teaspoon black pepper: Adds a subtle kick that wakes up your palate.
- 1 tablespoon smoked paprika: Brings a warm, smoky depth that makes the chicken extra special.
- 1 tablespoon garlic powder: Fiery undertones that pack a punch without overpowering.
- 2 tablespoons olive oil: Keeps the chicken juicy and golden when cooked.
- 1 cup mayonnaise: The creamy base of the Caesar dressing that ties flavors together smoothly.
- 1 tablespoon Dijon mustard: Adds a tangy sharpness that brightens the dressing.
- 1 tablespoon Worcestershire sauce: Infuses a rich umami note, making the dressing irresistible.
- 1 teaspoon black pepper (for dressing): Builds on the seasoning profile for balance.
- 1 tablespoon lemon juice: Gives a fresh, zesty lift to the dressing.
- 2 cloves garlic grated: Provides that classic Caesar garlic punch.
- 1 tablespoon olive oil (for dressing): Adds silkiness and richness.
- ⅔ cup Parmesan cheese grated: Sharp, nutty, and essential for authentic Caesar flavor.
- 2–3 tablespoons water: To thin the dressing, achieving perfect pourability.
- 2 cups lettuce finely chopped and dried: For crisp freshness that contrasts beautifully with the creamy dressing.
- ½ cup Parmesan cheese grated (for salad): Boosts that cheesy Caesar touch inside the filling.
- ½ cup croutons: The secret crackly ingredient that adds extra crunch.
- ½ cup Caesar dressing: To coat the salad mix, tying all the flavors together.
- 4 large tortilla wraps: The perfect canvas to hold this delicious filling together.
- 4 tablespoons oil for toasting: Creates the signature crispy, golden crust on the wraps.
How to Make Easy Crispy Chicken Caesar Wraps (Extra Crunchy!)
Step 1: Marinate the Chicken
Begin by seasoning your chicken cubes with salt, black pepper, smoked paprika, and garlic powder. Drizzle with olive oil and toss everything together until every bite is coated evenly. If you can, let the chicken rest and soak in these flavors for 1 to 2 hours in the fridge. This step may take a little patience, but believe me, the payoff is incredibly worth it.
Step 2: Cook the Chicken
Heat a skillet over medium heat and add a splash of oil. Cook the chicken cubes until they turn golden brown and are fully cooked through, about 10 to 12 minutes. The aroma while cooking is downright inviting, and the texture when done should be perfectly juicy with a hint of that smoky seasoning.
Step 3: Make the Caesar Dressing
In a mixing bowl, whisk together the mayonnaise, Dijon mustard, Worcestershire sauce, grated garlic, Parmesan cheese, lemon juice, and olive oil. Season with salt and pepper, and if the dressing feels too thick, add 2 or 3 tablespoons of water to reach a creamy, easily pourable consistency. If you’re short on time, a good quality store-bought Caesar dressing works just fine too, though homemade always wins for flavor.
Step 4: Mix the Salad Filling
In a large bowl, combine your finely chopped lettuce, cooked chicken cubes, extra Parmesan, fresh crunchy croutons, and the prepared Caesar dressing. Give everything a good toss so the flavors marry beautifully. Here’s a nifty tip: grab a pizza cutter and chop the entire mix finely. This creates a compact, bite-sized filling that’s easier to wrap and eat, making every mouthful perfect.
Step 5: Assemble the Wraps
Lay out each tortilla flat and spoon generous amounts of the chicken Caesar mixture right in the center. Fold up the sides and roll tightly to form the wrap. Taking your time here ensures nothing spills out during the final steps.
Step 6: Crisp Them Up
Heat a skillet on medium-low with a little oil. Toast each wrap one at a time, pressing gently and cooking until the outside is golden, crispy, and has those satisfying crunch sounds — about 3 to 4 minutes per side. This step transforms your wrap from simple to spectacular, delivering the extra crunchy texture you’re craving.
Step 7: Serve & Enjoy
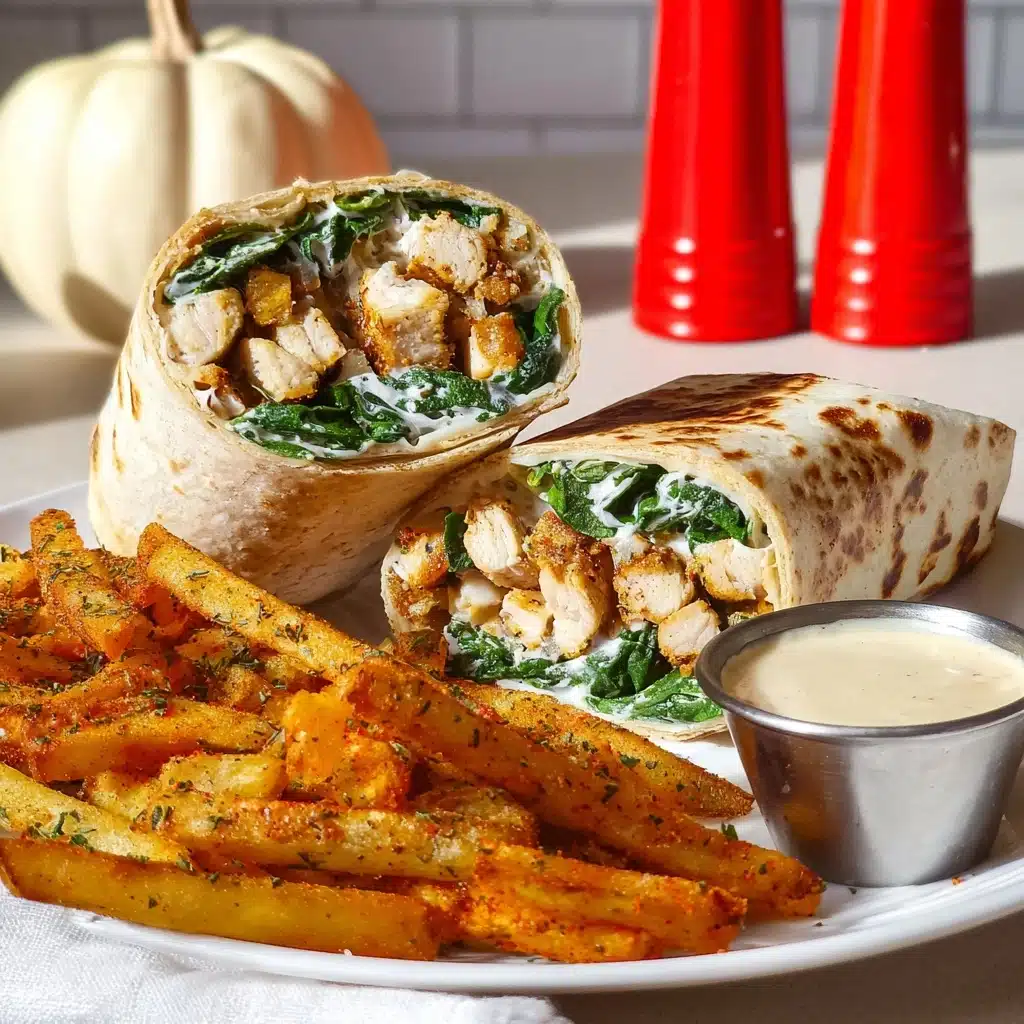
Slice the wraps in half at a diagonal to showcase the colorful filling inside. Serve warm with extra Caesar dressing on the side for dipping. Bonus points if you add some fries or your favorite crispy side for a complete feast—and you’ll find it’s hard not to go back for seconds!
How to Serve Easy Crispy Chicken Caesar Wraps (Extra Crunchy!)
Garnishes
Sprinkle a bit of extra grated Parmesan or freshly cracked black pepper on top of the wraps just before serving. A few whole croutons on the side not only add visual appeal but keep that crunch factor alive. Fresh lemon wedges can be squeezed over for a bright, citrus tang that complements the creamy dressing beautifully.
Side Dishes
Pair your wraps with crispy fries, sweet potato wedges, or a simple mixed green salad for a lighter option. For an extra touch of indulgence, a side of garlic aioli or a tangy dipping sauce makes the meal even more exciting. The wraps are versatile enough to hold their own or fit into a bigger spread effortlessly.
Creative Ways to Present
Want to impress guests? Cut the wraps into bite-sized pinwheels for party-style finger food or serve the filling in lettuce cups for a low-carb twist. Wrapping the halves in parchment paper and tying with twine adds a rustic, charming vibe perfect for picnics or packed lunches.
Make Ahead and Storage
Storing Leftovers
Leftover Easy Crispy Chicken Caesar Wraps (Extra Crunchy!) store best wrapped tightly in foil or plastic wrap and kept in the refrigerator. It’s ideal to consume them within 1 to 2 days to maintain maximum freshness and crunch—though the flavor still holds up pretty well for longer.
Freezing
Because the wraps rely on fresh lettuce and crispy texture, freezing isn’t recommended. The lettuce will wilt, and textures degrade, which means your wraps won’t be the same delightful crunchy experience once thawed. Save freezing for the chicken cubes or dressing if you want to prep parts ahead.
Reheating
To reclaim that crispy exterior, reheat the wraps in a skillet over medium heat with a little oil rather than a microwave. This method restores the crunch and warms everything evenly. If you’re in a hurry, a quick zap in the microwave followed by a skillet crisp-up works wonders.
FAQs
Can I use chicken thighs instead of breasts?
Absolutely! Chicken thighs have more fat, which can add extra juiciness and flavor. Just cut them into cubes like the recipe instructs and adjust cooking time as needed to ensure they are fully cooked.
Is it possible to make this recipe gluten-free?
Definitely. Use gluten-free tortillas and substitute croutons with your favorite gluten-free crunchy element like roasted chickpeas or toasted nuts. The rest of the ingredients are naturally gluten-free.
What can I do to make the wraps spicier?
Add a pinch of cayenne pepper or chili powder to the chicken marinade or mix some hot sauce into the Caesar dressing. A dash of red pepper flakes sprinkled on top after assembling also brings a nice heat boost.
Can I prepare the chicken and dressing ahead of time?
Yes! The chicken can be cooked and stored in the fridge for up to 2 days, and the Caesar dressing keeps well for about a week in a sealed container. Assemble the wraps just before serving to keep everything fresh and crunchy.
What’s the best way to chop the salad filling finely?
A pizza cutter is your best friend here. After tossing all salad ingredients and chicken together, run the pizza cutter through the mix on a cutting board a few times. It breaks down larger pieces without crushing the textures, making the filling easier to wrap.
Final Thoughts
Trust me when I say these Easy Crispy Chicken Caesar Wraps (Extra Crunchy!) are exactly the kind of recipe that brings joy to your kitchen and to your table. They’re easy to make but packed with layers of texture and flavor, perfect for busy days or casual meals with friends. So grab your ingredients, roll up your sleeves, and get ready to enjoy a wrap that’s crunchy, creamy, smoky, and utterly delicious!
Print
Easy Crispy Chicken Caesar Wraps (Extra Crunchy!) Recipe
- Total Time: 1 hour 30 minutes (including marinating time)
- Yield: 4 wraps
- Diet: Halal
Description
These Easy Crispy Chicken Caesar Wraps deliver a perfect blend of tender, smoky marinated chicken, creamy homemade Caesar dressing, crisp lettuce, and crunchy croutons all wrapped in a warm, toasted tortilla. The secret finely chopped filling ensures every bite is packed with flavor and texture, making it an excellent quick lunch or dinner option that’s both satisfying and delicious.
Ingredients
For the Chicken
- 2 lb boneless chicken breast, cut into cubes
- Salt to taste
- 1 teaspoon black pepper
- 1 tablespoon smoked paprika
- 1 tablespoon garlic powder
- 2 tablespoons olive oil
For the Caesar Dressing
- 1 cup mayonnaise
- 1 tablespoon Dijon mustard
- 1 tablespoon Worcestershire sauce
- Salt to taste
- 1 teaspoon black pepper
- 1 tablespoon lemon juice
- 2 cloves garlic, grated
- 1 tablespoon olive oil
- ⅔ cup Parmesan cheese, grated
- 2–3 tablespoons water (to thin if needed)
For the Caesar Salad Mix
- 2 cups lettuce, finely chopped and dried
- ½ cup Parmesan cheese, grated
- ½ cup croutons
- ½ cup Caesar dressing
To Assemble
- 4 large tortilla wraps
- 4 tablespoons oil (for toasting)
Instructions
- Marinate the Chicken: In a bowl, season the chicken cubes with salt, black pepper, smoked paprika, and garlic powder. Drizzle with olive oil and toss until evenly coated. Cover and let it marinate for 1–2 hours to enhance the flavors.
- Cook the Chicken: Heat a skillet over medium heat and add a little oil if needed. Add the marinated chicken cubes and cook for 10–12 minutes, stirring occasionally, until they are golden brown and fully cooked through. Remove from heat and set aside.
- Make the Caesar Dressing: In a mixing bowl, whisk together mayonnaise, Dijon mustard, Worcestershire sauce, grated garlic, grated Parmesan cheese, lemon juice, and olive oil. Season with salt and black pepper to taste. Thin the dressing with 2–3 tablespoons of water until it reaches a creamy, pourable consistency.
- Mix the Salad Filling: In a large bowl, combine the finely chopped lettuce, cooked chicken pieces, grated Parmesan cheese, croutons, and Caesar dressing. Toss everything well to combine. Using a pizza cutter, chop the mixture finely to ensure the perfect texture for the wrap filling.
- Assemble the Wraps: Lay a large tortilla flat on a clean surface. Spoon a generous portion of the Caesar mixture along the center of the tortilla. Fold the sides in and roll tightly into a wrap.
- Crisp Them Up: Heat a skillet over medium-low heat and add a tablespoon of oil. Carefully place each wrap seam side down in the skillet. Toast for 3–4 minutes on each side or until golden brown and crispy, pressing gently with a spatula if needed.
- Serve & Enjoy: Slice the wraps in half diagonally and serve warm with extra Caesar dressing on the side. Optionally, serve with fries or your favorite side dish for a complete meal.
Notes
- Marinating the chicken for longer enhances flavor but can be skipped if short on time.
- You can substitute store-bought Caesar dressing if desired for convenience.
- Use fresh, crisp lettuce such as romaine for authentic Caesar flavor.
- Wraps can be toasted in a panini press or grill for an alternative crisp texture.
- Leftover filling can be used as a salad topping or sandwich spread.
- To make it lower fat, use light mayonnaise and reduce olive oil in the dressing.
- Prep Time: 15 minutes (plus 1–2 hours for marinating)
- Cook Time: 15 minutes
- Category: Lunch, Dinner, Wraps
- Method: Marinating, Pan-cooking, Toasting
- Cuisine: American
Nutrition
- Serving Size: 1 wrap
- Calories: 550
- Sugar: 3g
- Sodium: 780mg
- Fat: 32g
- Saturated Fat: 8g
- Unsaturated Fat: 22g
- Trans Fat: 0g
- Carbohydrates: 38g
- Fiber: 3g
- Protein: 38g
- Cholesterol: 110mg

