
Short Description
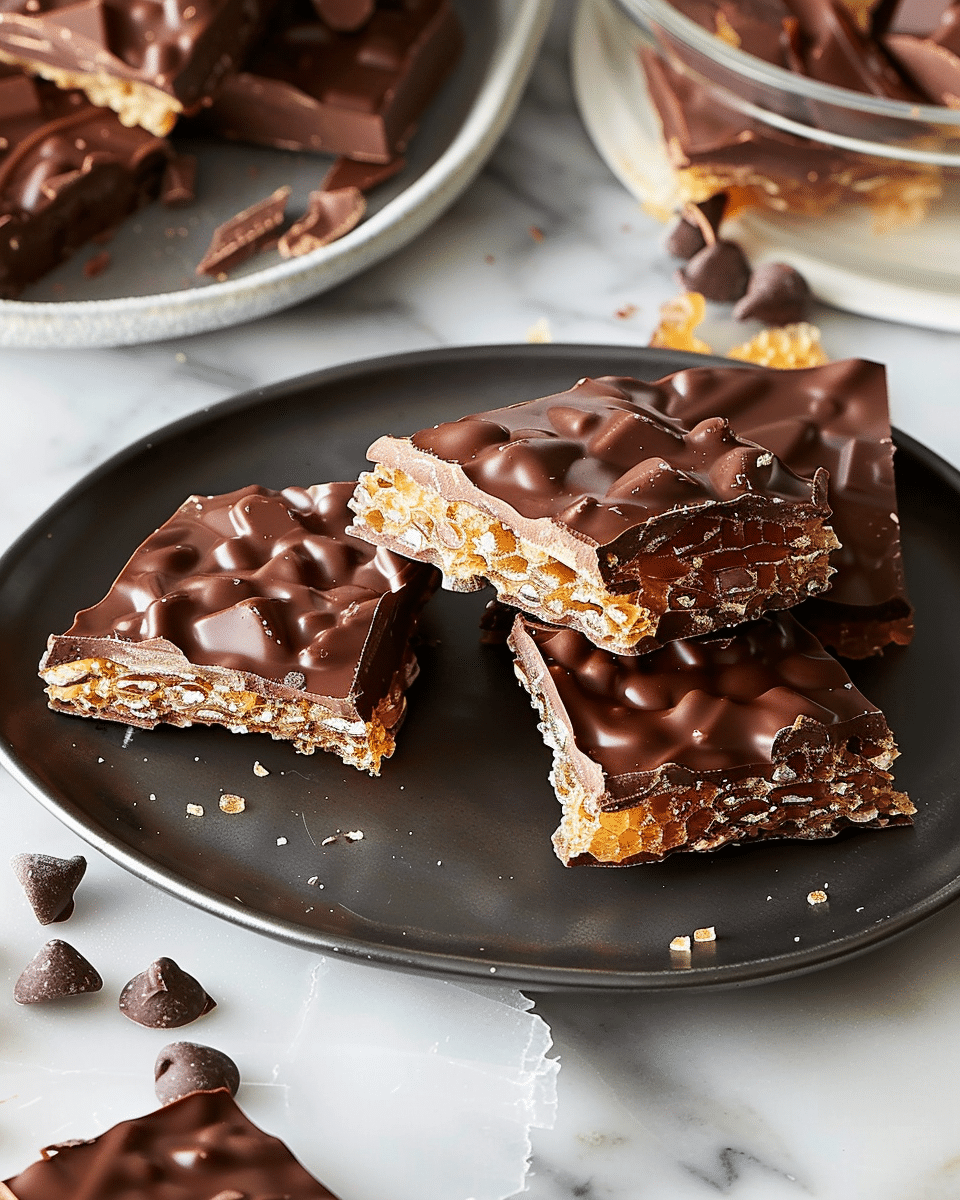
Chocolate Coated Honeycomb is a crunchy, sweet treat with a satisfying texture and rich chocolate coating. The honeycomb candy is light and airy, with a delicate honey flavor that pairs perfectly with dark chocolate. A sprinkle of flaky sea salt on top elevates this indulgent snack, making it perfect for sharing or gifting!
Why You’ll Love This Recipe
This homemade chocolate-coated honeycomb is the ultimate indulgence—crispy, airy, and crunchy with a deep honey flavor and rich chocolate coating. The honeycomb itself is made from simple pantry ingredients, and the dark chocolate coating adds an extra layer of richness. It’s the perfect sweet snack or gift for any occasion, and once you try it, you’ll be hooked on this homemade candy!

Ingredients
For the Honeycomb:
- 2 ½ teaspoons baking soda
- ¼ teaspoon cream of tartar
- ½ cup water
- 1 tablespoon honey
- 1 ¾ cups granulated sugar
- ¼ teaspoon kosher salt
- ¾ cup golden syrup or dark corn syrup
For the Chocolate Coating:
- 24-ounce dark chocolate bar (or high-quality chocolate chips), finely chopped
- Flaky sea salt, for garnish
(Tip: You’ll find the full list of ingredients and measurements in the recipe card below.)
Directions
Step 1: Prepare the Baking Sheet
- Cover a half sheet pan with parchment paper and spray it lightly with nonstick spray to prevent the honeycomb from sticking.
Step 2: Prepare the Baking Soda and Cream of Tartar
- In a small bowl, combine the baking soda and cream of tartar. Set the mixture aside, ready to add to the candy later.
Step 3: Cook the Honeycomb Mixture
- In a heavy-bottom saucepan, combine the water, honey, granulated sugar, golden syrup, and kosher salt. Over medium heat, bring the mixture to a boil, stirring initially just to dissolve everything. Once it starts boiling, stop stirring to prevent crystallization.
- Let the mixture continue to boil over medium heat until a thermometer reads 300°F (149°C), which is the hard crack stage.
Step 4: Add the Baking Soda and Cream of Tartar
- Remove the saucepan from the heat and immediately whisk in the prepared baking soda and cream of tartar mixture. Whisk constantly as the mixture will rapidly expand and bubble up, lightening in color and becoming airy. Be careful not to over-mix, or the honeycomb may deflate.
Step 5: Pour and Cool the Honeycomb
- Pour the molten candy onto the prepared baking sheet in an even layer, about ½ to 1 inch thick. Let it cool completely, which will take about 2 hours.
Step 6: Shatter the Honeycomb
- Once the honeycomb has cooled and hardened, break it into large shards. You can do this by hand, smashing it with a rolling pin, or by picking up the entire piece and dropping it back on the sheet pan to break it into pieces.
Step 7: Make the Chocolate Coating
- Melt the dark chocolate over a double boiler or in the microwave. If using the microwave, heat the chocolate in 10-second intervals, stirring after each session until it is fully melted and smooth.
Step 8: Coat the Honeycomb with Chocolate
- Using two forks, dunk each piece of honeycomb into the melted chocolate, coating it completely. Allow any excess chocolate to drip off before placing the coated pieces on a wire rack set over a baking sheet.
- While the chocolate is still wet, sprinkle each piece with a pinch of flaky sea salt for extra flavor.
Step 9: Let the Chocolate Set
- Let the chocolate coating set at room temperature or in the fridge until firm, which should take about 30 minutes to an hour.
Step 10: Store and Serve
- Once the chocolate has set, store the chocolate-coated honeycomb in an airtight container for up to 2 weeks (if it lasts that long!).
Servings and Timing
- Servings: 10-12 pieces (depending on size of shards)
- Prep Time: 20 minutes
- Cook Time: 20-25 minutes
- Cooling Time: 2 hours
- Total Time: 3 hours 30 minutes
Variations
- Milk Chocolate Version: For a sweeter option, you can substitute dark chocolate with milk chocolate for the coating.
- Nutty Honeycomb: Add crushed nuts such as hazelnuts or almonds to the melted chocolate before coating the honeycomb pieces.
- Spiced Version: Add a pinch of cinnamon or chili powder to the melted chocolate for a spiced kick.
Storage
- Storage: Keep the chocolate-coated honeycomb in an airtight container at room temperature for up to 2 weeks, or store it in the fridge for longer shelf life.
- Reheating: There’s no need to reheat the honeycomb, but you can let it sit at room temperature for a few minutes to soften if it has been refrigerated.
FAQs
1. Can I use other types of sugar?
Granulated sugar is best for this recipe, but you can try using caster sugar or superfine sugar if needed. Avoid using brown sugar as it will affect the texture of the honeycomb.
2. Can I make the honeycomb without a thermometer?
A thermometer ensures the sugar reaches the correct temperature for a crunchy texture. However, if you don’t have one, you can test the candy by dropping a small amount into a glass of cold water. If it hardens immediately and cracks when you break it, it’s reached the right stage.
3. How do I know when the honeycomb is done?
The honeycomb is ready when it reaches 300°F (149°C), also known as the hard crack stage. If you don’t have a thermometer, test it by dropping a small amount into cold water—it should form a brittle, crackable candy.
4. Can I make this without the cream of tartar?
Cream of tartar helps stabilize the candy and ensure a light texture, but if you don’t have any, you can omit it. However, the texture may not be as perfect without it.
5. Can I use other types of syrup instead of golden syrup?
If you don’t have golden syrup, you can substitute it with dark corn syrup. Golden syrup adds a unique flavor, so the substitute may slightly alter the taste but will still work well.
6. Can I make a batch without the chocolate coating?
Yes, you can make the honeycomb on its own without the chocolate. The honeycomb itself is delicious and crunchy even without the coating.
7. How do I make the shards more uniform?
To get more uniform shards, you can use a sharp knife to cut the honeycomb into pieces instead of smashing it by hand.
8. Can I freeze the chocolate-coated honeycomb?
Yes, you can freeze the honeycomb in an airtight container for up to 3 months. Just make sure to let it thaw at room temperature before eating.
9. Can I use this honeycomb in other desserts?
Yes, you can crush the honeycomb and use it as a topping for cakes, ice cream, or even as a filling for chocolates.
10. Can I use this recipe with other types of chocolate?
Absolutely! You can substitute dark chocolate with milk or white chocolate if you prefer a sweeter coating. Just make sure to melt it gently to prevent burning.
Conclusion
This Chocolate Coated Honeycomb is a fun and impressive treat that combines the crispy, airy texture of honeycomb candy with the richness of dark chocolate and the added touch of flaky sea salt. Perfect for snacking, gifting, or serving at parties, it’s an easy yet decadent homemade candy that everyone will love!
Print
Chocolate Coated Honeycomb
- Total Time: 3 hours 30 minutes
- Yield: 10-12 pieces (depending on size of shards)
- Diet: Vegetarian
Description
Chocolate Coated Honeycomb is a crunchy, sweet treat with a satisfying texture and rich chocolate coating. The honeycomb candy is light and airy, with a delicate honey flavor that pairs perfectly with dark chocolate. A sprinkle of flaky sea salt on top elevates this indulgent snack, making it perfect for sharing or gifting!
Ingredients
For the Honeycomb:
2 ½ teaspoons baking soda
¼ teaspoon cream of tartar
½ cup water
1 tablespoon honey
1 ¾ cups granulated sugar
¼ teaspoon kosher salt
¾ cup golden syrup or dark corn syrup
For the Chocolate Coating:
24-ounce dark chocolate bar (or high-quality chocolate chips), finely chopped
Flaky sea salt, for garnish
Instructions
- Prepare the Baking Sheet: Cover a half sheet pan with parchment paper and spray it lightly with nonstick spray to prevent the honeycomb from sticking.
- Prepare the Baking Soda and Cream of Tartar: In a small bowl, combine the baking soda and cream of tartar. Set the mixture aside, ready to add to the candy later.
- Cook the Honeycomb Mixture: In a heavy-bottom saucepan, combine the water, honey, granulated sugar, golden syrup, and kosher salt. Over medium heat, bring the mixture to a boil, stirring initially just to dissolve everything. Once it starts boiling, stop stirring to prevent crystallization. Let the mixture continue to boil over medium heat until a thermometer reads 300°F (149°C), which is the hard crack stage.
- Add the Baking Soda and Cream of Tartar: Remove the saucepan from the heat and immediately whisk in the prepared baking soda and cream of tartar mixture. Whisk constantly as the mixture will rapidly expand and bubble up, lightening in color and becoming airy. Be careful not to over-mix, or the honeycomb may deflate.
- Pour and Cool the Honeycomb: Pour the molten candy onto the prepared baking sheet in an even layer, about ½ to 1 inch thick. Let it cool completely, which will take about 2 hours.
- Shatter the Honeycomb: Once the honeycomb has cooled and hardened, break it into large shards. You can do this by hand, smashing it with a rolling pin, or by picking up the entire piece and dropping it back on the sheet pan to break it into pieces.
- Make the Chocolate Coating: Melt the dark chocolate over a double boiler or in the microwave. If using the microwave, heat the chocolate in 10-second intervals, stirring after each session until it is fully melted and smooth.
- Coat the Honeycomb with Chocolate: Using two forks, dunk each piece of honeycomb into the melted chocolate, coating it completely. Allow any excess chocolate to drip off before placing the coated pieces on a wire rack set over a baking sheet. While the chocolate is still wet, sprinkle each piece with a pinch of flaky sea salt for extra flavor.
- Let the Chocolate Set: Let the chocolate coating set at room temperature or in the fridge until firm, which should take about 30 minutes to an hour.
- Store and Serve: Once the chocolate has set, store the chocolate-coated honeycomb in an airtight container for up to 2 weeks.
Notes
- Milk Chocolate Version: For a sweeter option, you can substitute dark chocolate with milk chocolate for the coating.
- Nutty Honeycomb: Add crushed nuts such as hazelnuts or almonds to the melted chocolate before coating the honeycomb pieces.
- Spiced Version: Add a pinch of cinnamon or chili powder to the melted chocolate for a spiced kick.
- Prep Time: 20 minutes
- Cook Time: 20-25 minutes
- Category: Candy
- Method: Cooking
- Cuisine: American
Nutrition
- Serving Size: 1 piece
- Calories: 140 kcal
- Sugar: 18 g
- Sodium: 60 mg
- Fat: 8 g
- Saturated Fat: 5 g
- Unsaturated Fat: 3 g
- Trans Fat: 0 g
- Carbohydrates: 16 g
- Fiber: 1 g
- Protein: 1 g
- Cholesterol: 10 mg


